|
 At
the time my wife and I
decided to offer our sloop to the Maritime Museum, I
decided to make a
hull as a very high quality copy of the original just to
have the lines
available in case I decided to make
a complete model or use the copy for more models of the sloop. At
the time my wife and I
decided to offer our sloop to the Maritime Museum, I
decided to make a
hull as a very high quality copy of the original just to
have the lines
available in case I decided to make
a complete model or use the copy for more models of the sloop.
|
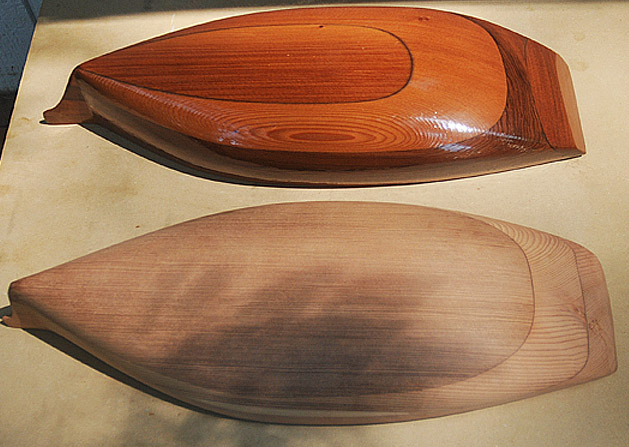
 The hull replicas of my original
1880 model sloop - but without keels. The hull replicas of my original
1880 model sloop - but without keels.
Both
of these hulls to the left are a copies of the original
above but I wanted to see the shape of the boat without
a keel.
The paint on the model is semi gloss (now) and the look of the hull is
slightly different than the replicas and a different angle of view to
the immediate left. The paint finish makes a big difference. The
replica is within 1 mm in most places on the replica hull. For a short
time I had both side by side and they are very nearly the same.
And...the upper hull has a rail and the lower hull are to the deck
line (the blue line on the model.
The hull to the upper copy model is redwood finished with
yacht varnish and
a stub ready to take a bowsprit I will add the keel which I
find much easier
than trying to get the hull shape and the keel added at
the same time.
Some Trickery...both models to the left are nearly
identical!
The upper varnished model has "PhotoShoped keel". The
keel was borrowed
from the original above. Using Photoshop, I traced the shape of the keel
below, copied
it, and pasted it onto the varnished copy to the left
and blended both. Take a look at
the spotted damage of the keel below and then loot
above. You will see
most of the defects on the keel below in the keel above. And you will see a slight bend in the keel at the white waterline area of the above keel near the lower keel.
 The was done to give you a better understanding of what
the copies on
this page will look as finished sloops. Presently my
plan is to use the
copy of a copy to make a fully rigged version of what I
know from the
sloop and by using information from some of the photos
of small 2
masted schooners. You can also see how much easier it is
to get a perfect hull shape, and then put the keel on.
The was done to give you a better understanding of what
the copies on
this page will look as finished sloops. Presently my
plan is to use the
copy of a copy to make a fully rigged version of what I
know from the
sloop and by using information from some of the photos
of small 2
masted schooners. You can also see how much easier it is
to get a perfect hull shape, and then put the keel on.
|
Doghole schooners and
commercial sloop lines.
|
WE
NEED DRAWINGS OF, AND DOCUMENTATION FOR, DOGHOLE
SCHOONERS
This is another place to
mention our need for documentation. We
desperately need drawings or sketches of doghole schooners.
All we have for a side view is the drawing I will make
from the sloop and a half model I will have access to.
If you have an
interesting hand made model or model parts or any kind or documentation
on dodhole schooners please let me know. If you prefer, I will look at
your photos and let you know what I think. If I have doubts, I now know
several experts who would be glad to look at the photos of the model,
or your documentation.
CONTACT ME BY EMAIL:
STEVE
( AT ) SLMH2006 (
dot ) NET
|
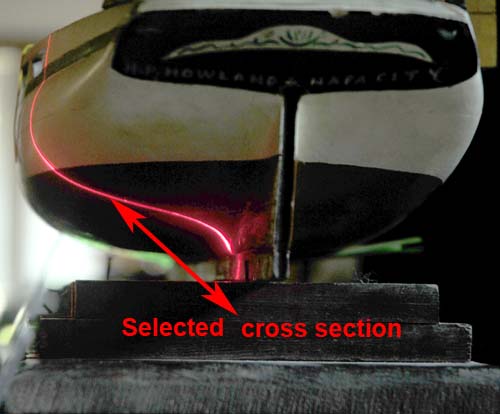
The side view of the model below shows a vertical red arrow. The
red
arrow represents the laser mark on the transom image below. Using
Photoshop it is possible to show only the red laser line on the
hull.
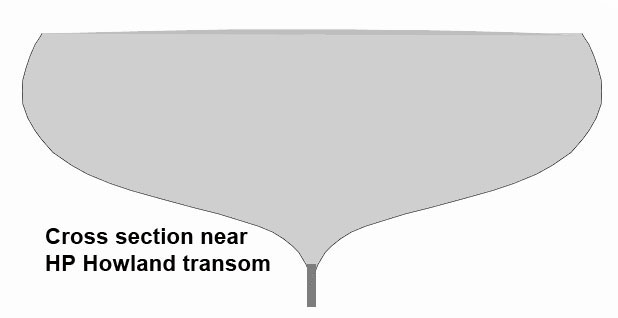
This idea was mentioned earlier This is just a quick statement to
emphasize the process. The red laser line can be converted to a
black
and white cross section. By showing a mirror image and combining
the
images you can PRINT on a stiff piece paper, a nice cross section
which
is the third image in this set. And by cutting the gray image in
half
and cutting the gray area out the piece of paper can be placed
against
the hull at the right point to measure and adjust the hull shape.
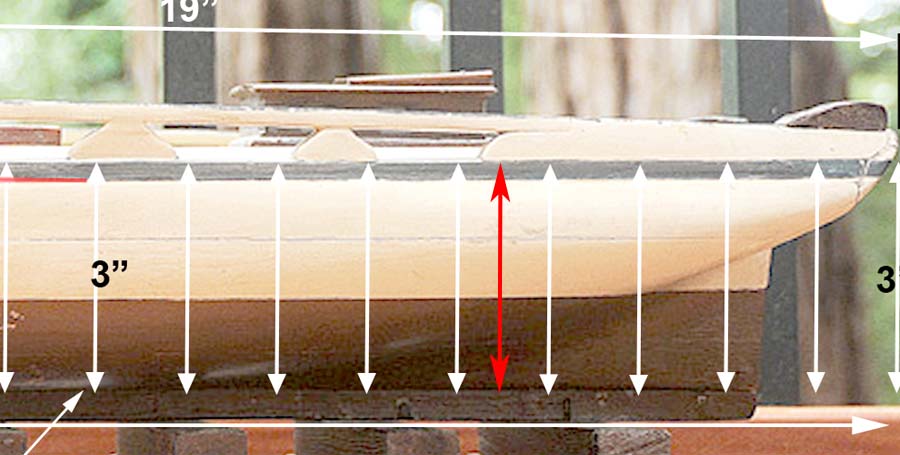
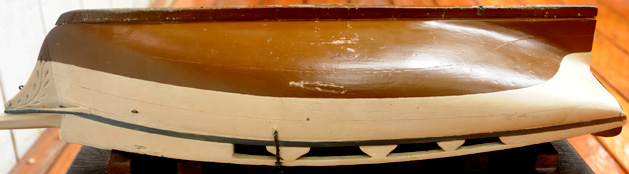
The profile below comes from hand applied laser lines to the sloop above.
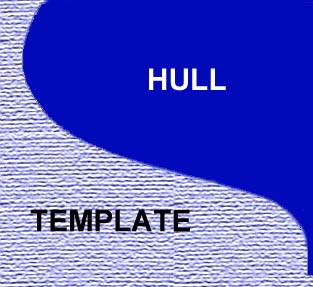
Template
Note: the template is the light blue texturized area in this illustration.
Once I had enough profiles of the sloop model, I could make the full
sized model out of a soft wood. The light blue texturized area is a thick paper
template for the position measured on the sloop hull shape. I then adjusted each point of the hull according
to each different template.
For me this was half engineering and half sculpturing sanding carefully
and checking the template for each point on the hull on both sides. I
worked very slowly using finer and finer sand paper until the hull
looked and felt right. This porecess took me about a week to make a
precision copy of the original hull. An example is shown below.
SOME EARLY WOODWORK
 To
the left is an example of the start of hull work. The first stage is
done with whatever tools will work. I used a band saw, an electric
planer, a power sander, and a hand planer. To
the left is an example of the start of hull work. The first stage is
done with whatever tools will work. I used a band saw, an electric
planer, a power sander, and a hand planer.
Sanding down to the left side shape was done with #36 grit sandpaper on a power sander. Then #80 grit, etc.
By the way, #36 grit on a random-orbit rotary hand sander is like a planer...more wood can be lost than you think!
As time consuming as this looks a rough shape can be done in an hour. The main
trick is to stay over sized
to get to a point for the use of the precision template sanding and
final shaping. The wood in my examples is extremely dry redwood heart
wood in 2 inch slabs. This , by the way, is how the original model hull
was made - slabs of what I think was balsa. I don't know how much balsa
was available in The San Francisco area in 1880. But the model maker
may have been a captain in the Howland family. A captain would have a
chance to go to the South America and bring some balsa back to his home.
Cutting to much off the hull in this case is a serious mistake as always in woodworking. If you try this, take your time!
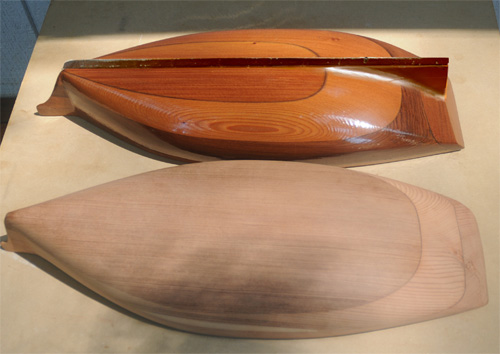
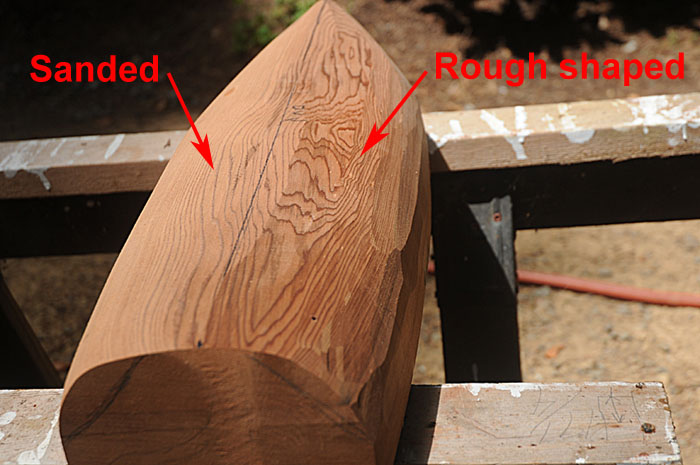
Start and finish
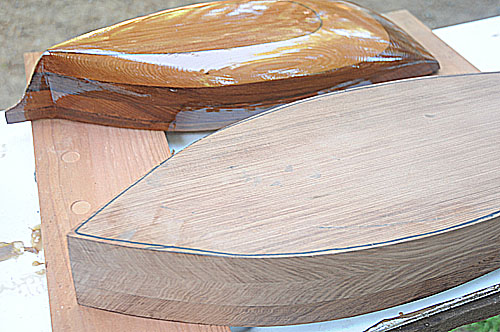 To
the left is a finished sloop hull without a keel on the model sloop.
The right side of the image, in a very rough state, is a start at a
doghole schooner. The schooner model will be about 30 inches,
representing a 75 foot schooner. To
the left is a finished sloop hull without a keel on the model sloop.
The right side of the image, in a very rough state, is a start at a
doghole schooner. The schooner model will be about 30 inches,
representing a 75 foot schooner.
 Website
Under Construction Website
Under Construction
|